Docker Commands Cheat Sheet

November 19, 2021 | Last updated: January 18, 2024
Table of Contents
- Docker container commands
- List all running containers
- List all containers (irrespective of state)
- List all running containers with file size
- List IDs of running containers
- List IDs of all containers (irrespective of state)
- Filter container list
- Create new container from Docker image
- Create new container from Docker image with fixed name
- Start container
- Stop running container
- Restart container
- Pause running container
- Resume paused container
- Run container
- Run container in foreground and detached modes
- Delete container on exited status
- Run container in detached mode
- Run container with assigned name
- List running processes in container
- Map ports of container
- Rename container
- Run container in interactive mode
- Get inside running container
- Start container and keep it running
- Copy file from container to host
- Copy file from host to container
- Remove container
- Remove container after it exits
- Delete stopped containers
- Delete stopped and running containers
- Build Docker image from container
- Set environment variables in container
- Set environment variables in container from file
- Docker image commands
- List all images
- List all images (including dangling images)
- List image IDs
- Build image
- Build image with different tag
- Build image using custom-named Dockerfile
- Show image history
- Rename existing image
- Remove images
- Unused images
- Dangling images
- List dangling images
- Remove dangling images
- Remove dangling and unused images
- Docker logs commands
- Docker network commands
- Docker volume commands
- Docker registry commands
- System-wide Docker commands
- Additional resources
Docker is a containerization technology that lets developers build, ship and run applications inside containers. We can create different Docker containers for packaging different software as it uses virtualization at the level of an operating system.
This article is a comprehensive list of Docker commands that you can refer to while building applications and packaging them in Docker containers, arranged from the most fundamental, such as listing containers, to advanced commands that will help you debug your application directly in the container and manage Docker networks and resources.
Docker container commands
The commands below refer to running and managing Docker containers.
List all running containers
docker ps
- You can also use
docker container psordocker container lsto list all the running containers. - There is no difference between
docker psanddocker container pscommands with respect to the result of their execution. docker psis old syntax and is supported for backward compatibility.- The
docker container lscommand is an appropriate version of the command compared topsaslsis a shortcut forlist.
List all containers (irrespective of state)
This command is used for listing all the containers (active and inactive):
docker ps -all
As can be seen from the screenshot above, the container objective_margulis is not running while the container sharp_cori is up since the last hour.
Short form of --all:
docker ps -aList all running containers with file size
This command adds the SIZE column to the output:
docker ps -s
As it can be seen from the screenshot above, 1.09kB is the disk space used by the container (writable layer). In simple words, the value in the SIZE column represents the size of the data that is written by the container in its writable layer.
The value in brackets virtual 133MB represents the amount of disk space used by the image of this container.
Short form of --size:
docker container ls -sList IDs of running containers
Adding the --quiet parameter modifies the docker ps output and displays only the IDs of running containers:
docker ps --quiet
Short form:
docker container ls -qList IDs of all containers (irrespective of state)
docker ps -a -q
You can also write the command by combining a and q:
docker ps -aqFilter container list
You can filter the output of docker ps and docker ps -a commands using the --filter option (or -f in short):
docker ps -f name=un
In the screenshot above, the command filters the containers and only displays those whose name starts with un.
Similarly, we can add -f option with the docker ps -a command:
docker ps -a -f name=ar
We can also filter the containers on the basis of the status:
docker ps -a -f status=running
As you can see, the command filters the containers, displaying only the running ones on the list.
Create new container from Docker image
The docker create command is used to create a new container from a Docker image. It does not run the container, just adds a writable layer on top of the Docker image.
docker create <image_name>docker start command.
As the docker create command interacts with the container object, you can also use the below command:
docker container create <image_name>Let's create a container using an NGINX Docker image:
docker create nginx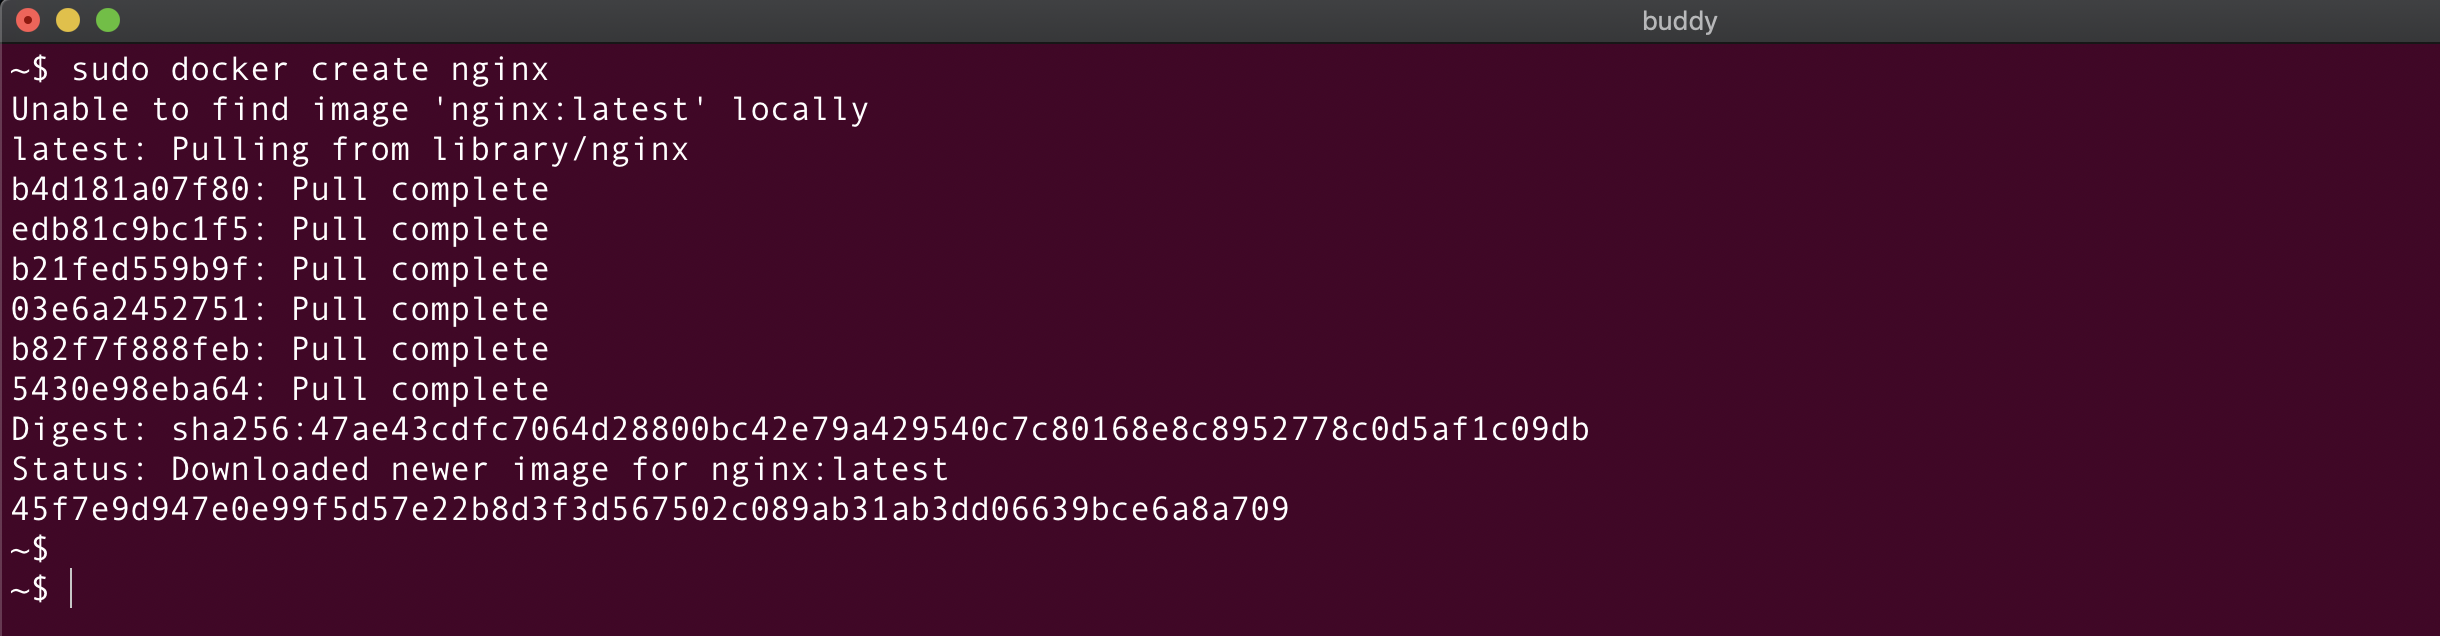 Creating NGINX container
Perfect! The container is created. Let's verify it using the docker ps command:

The status of the container is Created as expected!
nginx container trusting_bouman is some random string and would be different on your system.
Create new container from Docker image with fixed name
You can also create a Docker container with fixed names. Let's do that right away:
docker create --name <container_name> <image_name>Let's create a container named nginx-container using an nginx image:
docker create --name nginx-container nginx
Neat! The container nginx-container has been successfully created.
Start container
A created container can be run with the following command
docker start <container_id or container_name>Let's start the nginx-container:
docker start nginx-container
As seen from the above screenshot, nginx-container is created and the docker ps command is used to verify the status of the container.
We can use the docker start command either using the container ID or name. This means we can also start it as:
docker start df1c49ee5275Stop running container
To stop a running container, run:
docker stop <container_id or container_name>Here's the command for stopping our nginx-container:
docker stop nginx-container
As you can see, the container nginx-container was exited 17 seconds ago. This container won't be listed in the docker ps command.
Restart container
docker restart <container_id or container_name>
The nginx-container is now restarted and is up for the last 8 seconds.
Pause running container
docker pause <container_id or container_name>Let's try to pause the nginx-container:
docker pause nginx-container docker pause command results
Resume paused container
To resume a paused container, you can use the unpause command:
docker unpause <container_id or container_name>So, to unpause the nginx-container, we simply run:
docker unpause nginx-container
Run container
It rarely happens that we create the container and run it later. Generally, in real-world cases, we create and run the container in one go using the docker run command, which is a combination of create and start commands:
docker run <image_name>Run container in foreground and detached modes
The Docker container can run in two modes:
- Foreground mode (default)
- Background or detached mode
The foreground mode is the default when it comes to running containers. In this mode, Docker starts the root process in the container in the foreground and attaches the standard input (stdin), output(stdout), and error (stderr) of the process to the terminal session.
Let's create and run a container in the foreground mode using the nginx Docker image:
docker run nginx
The nginx is running in the foreground, which means this terminal session cannot be used for executing other commands or performing any other operation.
Let's launch a new terminal tab and check the status of the container. We can see the container was created and is running:
docker ps
If we end the terminal session by closing the terminal tab or by pressing CMD+C/CTRL + C, the container should die automatically. Running docker ps will confirm this is what indeed happened:

exited, not deleted. This is because when the container exits or is stopped, the filesystem of the container continues to persist on the host machine.
Delete container on exited status
If you want to delete the container after it is exited, you can start it with the --rm parameter:
docker run --rm nginx--rm option removes the filesystem of the container once it is stopped or when the container exits automatically.
Run container in detached mode
To run the container in the background/detached mode, you can use the --detach parameter:
docker run -d <image_name>Let's run a container from an nginx image in the background mode:

From the above image, we can see that the container process is not attached to the terminal session and the container is running in the background mode. This is also confirmed by the docker ps command:

Run container with assigned name
You can assign a name to a container by adding the --name flag to the run command followed by the container details:
docker run -d --name <container_name> <image_name>In other words, if we want to create a container named nginx-container from nginx image, we run:
docker run -d --name nginx-container nginx
List running processes in container
To list the processes running within a container, run:
docker top <container_name or container_id>
Here, we can see that inside our aptly named nginx-container there are two processes running with the IDs 4685 and 4747.
Map ports of container
Docker exposes the same port on the host machine that is exposed by the container. For example, if the nginx process listens on port 80, a container running nginx will expose it from the port 80 of the host machine.
As we now that one port cannot be used by multiple processes, we can use port mappings to run multiple nginx containers on the same host machine.
You can map the ports of the container by adding the following flags to the docker run command:
docker run --name <container_name> -d -p <host_post>:<container_port> <image_name>To expose an nginx container (port 80) on port 8080 of the host machine, use the following command:
docker run --name nginx-container -d -p 8080:80 nginx
Above we can see that the ports have been properly assigned. Since the container is mapped to the port 8080 of the host machine, we can access the container on port 8080 using the curl command:

Rename container
To change the name of a Docker container, use the docker rename command:
docker rename <old_name> <new_name>Let's rename nginx-container to nginx-cont:
docker rename nginx-container nginx-cont
Run container in interactive mode
If we run the container in interactive mode by applying the -it flag, Docker will attach the stdin (standard input) of the container to the terminal. This will give us access to the container and the ability to run any command inside.
In this example, we run the container in interactive mode and start the bash shell inside the container:
docker run -it <image_name> /bin/bashLet's create a container from our favorite nginx image and run the bash command inside the container:
docker run -it nginx /bin/bash
We're in! Now, we can execute any command we want. Open a new terminal tab and list down the running processes:
docker top <container_name>
Here we can see there's only one process running in the container. This is the same process that we opened in the first terminal tab.
nginx master and nginx worker. Now, there is only one: bash shell. This is because we passed the /bin/bash command to docker run. This command overrides the Dockerfile's CMD and Entrypoint commands.
Get inside running container
If you want to access a container which is already running, docker exec is the command to go with:
docker exec -it <contaner_id or container_name> /bin/bashLet's run our container in detached mode and use the command to start a bash shell session:
docker run -d --name nginx-container nginx
docker exec -it nginx-container /bin/bash

Of course, it is possible to pass any command and execute it in the container, not only /bin/bash. Here's a quick example:
docker exec -it nginx-container echo "Hello, from container"
Start container and keep it running
The lifespan of a container depends on the root process inside the container. The process that we used before – nginx – is continuous and keeps the container running. However, if we run a process which is short-lived, the container will be killed as soon as the process has ended.
For example, if we run a container from the centos image, it will die as soon as the default bash command within has been executed:

We can trick a short-lived process to keep running by launching it with -dt parameters:
docker run -dt <image_name>-d – runs the container in detached mode (background)
-t – allocates a pseudo-tty (terminal)
This way the container will stay alive and allow you to access it via the terminal.
Here's how it looks in case of the centos image:
docker run -dt centos
Copy file from container to host
The filesystems of the Docker container and the host are isolated from each other. This means that we need to provide source and target paths for the container and host when copying content between them:
docker cp <container_id or container_name>:<source_file_path> <destination_path>Let's create a file file_insider_container.txt inside the centos-container:

Now, let's copy this file from the container to the host machine:
docker cp centos-container:file_insider_container.txt .
. in the command signifies that the destination path is the current location on the host machine.
Copy file from host to container
To copy files from the host to the container, you just need to reverse the order in the copy command:
docker cp <host_file_path> <container_id or container_name>:<target_file_path>Let's create another file, this time called on the localhost:

Now, we'll clone it to the CentOS container:
docker cp file_on_host.txt centos-container:/
Remove container
You can remove a Docker container with the docker rm command:
docker rm <container_name or container_id>
If the container is running, you first need to stop it:
docker stop <container_name or container_id>
You can also add the --force flag to remove a running container without stopping it:
docker rm -f <container_name or container_id>Remove container after it exits
Combining run and remove will create and run container that will be automatically deleted the moment it stops:
docker run --rm <image_name>Delete stopped containers
To purge all stopped containers, use the docker prune command:
docker container prune
Delete stopped and running containers
To delete all containers regardless of their state, use the following string:
docker rm -f $(docker ps -a -q)
docker container rm -f $(docker ps -a -q)
docker ps -a -q lists the IDs of both active and inactive containers, which are then forced to remove with the docker rm -f command.
Build Docker image from container
You can create Docker images from existing containers with the docker commit command:
docker commit <container_id or container_name> <new_image_name>
docker container commit <container_id or container_name> <new_image_name>
Example: we create a file in our CentOS container:
We'll create a file file_inside_container.txt inside the running container centos-container:

Let's now create an image (centos-with-new-file) from centos-container using the below command:
docker container commit centos-container centos-with-new-file
Set environment variables in container
Environment variables are used to store and access configuration settings, allowing you to control the behavior of your application without modifying its code. It is possible to set variables inside a Docker container using the below command:
docker run --env ENV_VAR1=value1 --env ENV_VAR1=value2 --name <container_name> <image_name>For example, to create an ENV VAR with the name NAME and the value Buddy inside a CentOS image, you should run:
docker run -dt --env NAME=Buddy --name centos-container centos-dt flag runs the centos-container in detached mode, preventing it from dying immediately upon command execution.
To check if the variable has been set correctly, use the printenv command:
docker exec -it centos-container printenv
Set environment variables in container from file
Using the --env-file parameter will let import variables directly from a file:
docker run --env-file <path_to_the_file> --name <container_name> <image_name>Here we have a file named file1.txt consisting of key-value pairs as shown below:

To create ENV VARs from the file inside our CentOS container, run:
docker run -dt --env-file file1.txt --name centos-container-1 centos
VAR=VALUE.
Let's create environment variables inside the centos-container-1 container using the file file1.txt:
-dt flag runs the centos-container in detached mode, preventing it from dying immediately upon command execution.
Docker image commands
Docker images are lightweight standalone packages and contain everything required to run software across different platforms. They are created from Dockerfiles, which define the instructions to build the image. The images are stored in image repositories, such as Docker Hub, Azure Container registry, or Google Artifact Registry.
List all images
To list all images stored locally on your computer, run:
docker images
List all images (including dangling images)
Adding the -all parameter will add unused (dangling) and intermediate images:
docker images -a
List image IDs
To list only the IDs of locally stored images, add the -q flag:
docker images -q
Build image
Docker images are created from Dockerfiles which contain build instructions and configuration.
To build an image from a Dockerfile, run:
docker build -t <image_name> <context_dir><context_dir> is the directory where the Dockerfile is stored.
Let's create a simple Dockerfile in the current directory:

With the Dockerfile created, we can run docker build :
docker build -t centos_buddy .
- The command pulls the CentOS image in the newest version from Docker Hub.
- The
.in the command indicates that the context directory is the current directory.
Let's verify if the image has been created with the docker images command:

If your Dockerfile is not in your current directory, you can specify it by adding the --file option:
docker build -f </path/to/dockerfilename> -t <image_name> .Build image with different tag
You can tag Docker images by running the following string:
docker build -t <image_name>:<tag or version> .For example, this command will build an image named centos_buddy with tag 1.8:
docker build -t centos_buddy:1.8 .
Build image using custom-named Dockerfile
If you have several Dockerfiles for various types of images, you can specify the one to use with:
docker build -f <custom_docker_file_name> -t <image_name> .For example:
docker build -f custom_docker_file -t centos_custom .
Show image history
To view the history of changes in your Dockerfile, run:
docker history <imagename or imageid>Here's an example for our centos_buddy image:

Rename existing image
To change the name of an existing image, run:
docker tag <imagename> <newname>:<version>
Remove images
If the image is not used by any container, you can delete it with the docker rmi command:
docker rmi <image_name or image_id>
--force flag to delete images in use:
bash
docker rmi -f <image_name or image_id>
Unused images
Unused Docker images are not used by any containers. If the images displayed with the docker ps -a command are images currently used by containers, then the equation for unused images would be:
(images from docker images -a) – (images from docker ps -a)Dangling images
When we build a Docker image from a Dockerfile, Docker creates an image with the given name. For example:
docker build -t mydockerimage .Here, Docker will create an image from the Dockerfile in the current directory with the name mydockerimage.
If we do some changes in the Dockerfile and rebuild the image again with the same name, Docker will update the name and tag of the previous image to <none>.
<none> and tag <none> are called dangling images.
List dangling images
To view the list of all dangling images, run:
docker images -f dangling=true
Remove dangling images
To clear up dangling images, run:
docker image prune
If the dangling images are referenced by containers (either running or not running), Docker will not prune them.
To remove the dangling images, you can run docker container prune followed by docker image prune. Once all stopped and unused containers are removed, so will the dangling images.
You can also clear the images and display a list of their IDs by running:
docker rmi $(docker images -f dangling=true -q)Remove dangling and unused images
You can add -a to the prune command to include all images not used by any containers:
docker image prune -aDocker logs commands
Let's now learn how to fetch logs from a Docker container.
Get container logs
We can get the logs of the Docker container as:
docker logs <container_id or container_name>
The above screenshot shows the logs of the container nginx-container.
To get a specific number of lines from the logs, you can add the --tail <number> option:
docker logs --tail 2 <container_id or container_name>
Monitor container logs
To display the last few lines of the container logs and monitor them, we can use the below command:
docker logs -f <container_id or container_name>The new messages in the container would be displayed here! This is similar to the tail -f command.

Docker network commands
Docker network commands are used to manage and configure networks in Docker. They allow you to create, list, inspect, connect, and disconnect containers from networks. Here are some of the most useful ones.
List all networks
This command will provide you with a quick overview of the existing networks on your Docker system. You can use this information to identify and select the appropriate network for connecting containers or performing other network-related operations.
docker network ls
Create network
Creating a Docker network will allow you to connect containers to it so that they can communicate:
docker network create --driver <driver-name> <bridge-name>driver-namecan be eitherbridgeoroverlay.bridgeis the default if--driveroption is not provided.
For example:
docker network create --driver bridge new-network
Show network information
To display the details of the Docker network, run:
docker network inspect <network_id or network_name>Get IP address of running container
You can fetch the precise IP address of a running container with the following command:
sudo docker inspect -f '{{range.NetworkSettings.Networks}}{{.IPAddress}}{{end}}' <container_name or container_id>
Connect container to network:
This command connects the container with the specified network:
docker network connect <network_id or network_name> <container_id or container_name>Let's look at an example:

The container nginx-container is connected to the network new-network. We can verify this using docker network inspect:

Connect container to network on start
This command automatically connects the Docker container to the network as soon as it starts:
docker run -d --network=<network_name or id> <contaienr_name>Disconnect container from network:
To disconnect the container from the network, run:
docker network disconnect <network_name_or_id> <container_name_or_id>
Remove network
To delete an existing Docker network, run the docker network rm command:
docker network rm <network_id or network_name>
Docker volume commands
A volume in Docker is a directory that is stored outside the container's file system. It allows you to persist and share data between containers or between a container and the host machine. The commands in this section will allow you to manage and manipulate volumes in your Docker containers.
Create volume
To create a new Docker volume, run:
docker volume create --name volume-name
List volumes
To list existing volumes, add ls:
docker volume ls
Mount volume using -v flag
We can mount the volume inside the Docker container once it is created using the below command:
docker run -it --name <container-name> -v <volume-name>:<path-in-container-where-volume-is-mounted> <image-name>- First, we create and name a new container <container-name> from the image <image-name>.
- Next, we mount the volume
volume-nameinside the container at the provided path.
Mount volume using --mount flag
The --mount flag is used to mount a directory from the host machine into a specific location inside the container:
docker run -it --name <container-name> --mount source=<volume-name>, destination=<path-in-container-where-volume-is-mounted> <image-name>Get volume details
You can fetch information about a specified volume, such as the volume name, driver used, and associated labels:
docker volume inspect <volume-name>Remove volume
To remove an existing volume, use the below command:
docker volume rm <volume-name>Mount volume with bind-mount
To mount any specific host directory inside the container, use the following command:
docker run -it -v /path/on/host:/path/in/contianer/where/volume/should/be/mounted <image-name>Create bind-mount volume using --mount flag
Bind-mount in Docker refers to the process of attaching a directory or file from the host machine to a specific location inside a Docker container.
docker run -it --name <container_name> --mount type=bind,source=/path/on/host/,target=/path/on/container first-imagetype=bind will override the contents with the host directory.
Docker registry commands
A Docker registry is a server-side repository that stores and distributes Docker images. By default, all images are pulled from Docker Hub. In fact, creating an account on Docker Hub should be the first thing to do when starting your journey with Docker.
Log in to Docker Hub
You can log in to Docker Hub from your terminal by running:
docker loginYou will be asked for your username and password:

Push image to registry
Once you've logged in, you can push Docker images to the registry using the below command:
docker push repository_name/imagename:tagDownload image from registry
To pull a Docker image, run:
docker pull imagename:tag- If the image is not present on the host machine, Docker will pull the image from the Docker registry.
- If no tag is specified, Docker will pull the latest image.

System-wide Docker commands
The last batch of commands will allow you to manage and interact with the Docker environment on your system.
Get Docker info
This command provides information about the Docker system, including the number of containers and images, storage driver used, and other system-related details:
docker info
Get stats of running containers
The docker stats will let you monitor resource utilization and identify possible performance issues of running containers:
docker stats
Get stats of all containers
Adding --all to the command will include stopped/exited containers to the list:
docker stats --allShow Docker version
This command provides the details on the Docker installed on your system:
docker version
Get detailed object info (container, image, volume, etc.)
You can retrieve detailed information on attributes and configuration of a specific object by adding its name or ID after the docker inspect command:
docker inspect <name or id>Circling back to our NGINX container, the command would look like this:
docker inspect nginxGet summary of Docker usage
You can view the disk usage of Docker containers, images, volumes, and cache by running:
docker system df
Clean your Docker system
The final command on the list is docker system prune, which is essential to keep up high performance of Docker on your machine:
docker system prune
The command will clean all unused Docker resources on your system:
- All stopped containers
- All networks not used by at least one container
- All dangling images
- All build cache
in 15 minutes with Buddy CI/CD 🐳
Additional resources

Rupesh Mishra
Senior Software Engineer @ Plate IQ
Rupesh Mishra is a backend developer, freelance blogger, and tutor. He writes about Python, Docker, Kafka, Kubernetes, and MongoDB. When he is not coding he enjoys watching anime and movies.
Read similar articles
Integration testing for AWS Lambda in Go with Docker-compose
Check out our tutorial
Securing our Docker image
Check out our tutorial
How to optimize Node.js Docker image (Part 2)
Check out our tutorial