React Quickstart For Beginners

April 22, 2021
Table of Contents
 Cover image
Learning the React framework as a beginner can be quite daunting. Since its initial release in 2013, React has undergone several changes. Here is a helpful React cheat sheet that provides a brief and easy-to-understand overview of the basics. This is not a complete React tutorial, just a reference sheet for quick tips to make your programming life easier. Let's get started!
What is React?
React enables developers to build responsive user interfaces for web apps. It is supported by developers at Facebook, Instagram, Airbnb, and Netflix among many others.
How does it work?
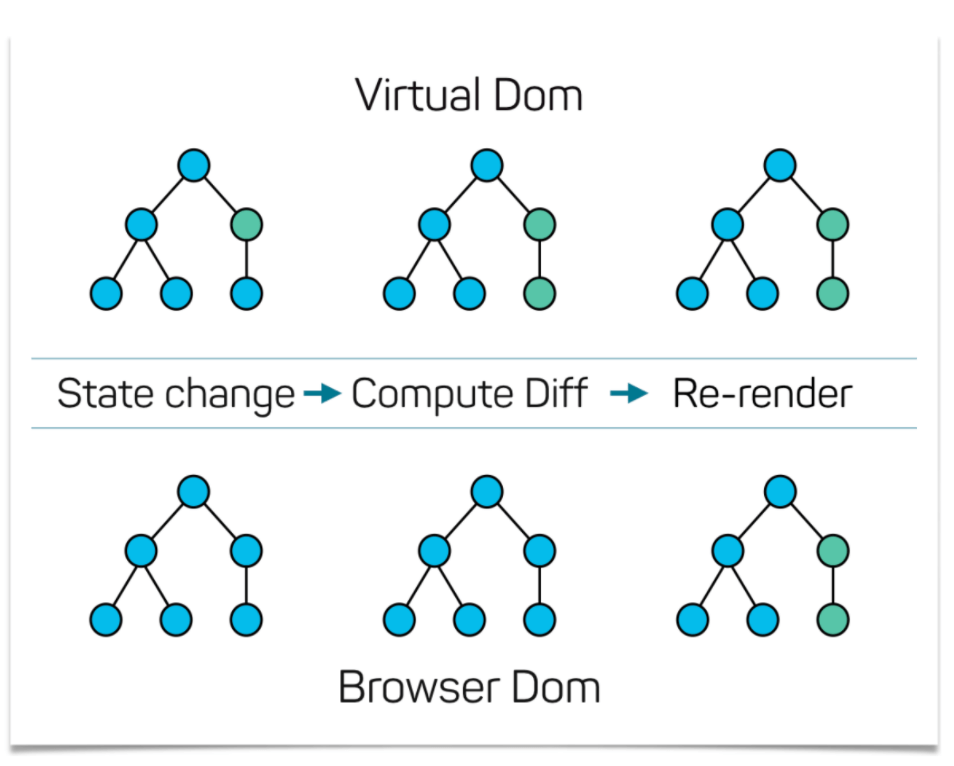
React keeps track of changes in the webpage by using a virtual DOM (Document Object Model) stored in its memory. It compares the previous and current virtual DOM to see if any updates, like text changes, have occurred. If there are changes, it updates the virtual DOM first and then displays the changes on the actual webpage in the browser. Refer to the diagram below for a visual representation.
 Visual and Browser DOM diagram
Changes in DOM can take a lot of time to load, that's why React is changeset-based, deploying things that need to be changed. This greatly improves overall performance.
What is JSX?
A core concept to understand in React is JSX, which stands for JavaScript XML. To put it bluntly: JSX enables you to incorporate HTML within your React code.
To understand the principle better, compare those two code blocks: (source):
//Using JSX
const myelement = <h1>I Love JSX!</h1>;
ReactDOM.render(myelement, document.getElementById('root'));
//Not using JSX
const myelement = React.createElement('h1', {}, 'I do not use JSX!');
ReactDOM.render(myelement, document.getElementById('root'));As you can see, using JSX allows us to write HTML elements in React in a very "clean" and accessible way.
ReactDOM.render()
Take note of the function ReactDOM.render() in the code snippets provided above. This function requires two arguments: the HTML code and the specific HTML element where the code will be displayed.
The top node is known as the 'root' node, usually used to render HTML code.
React Components
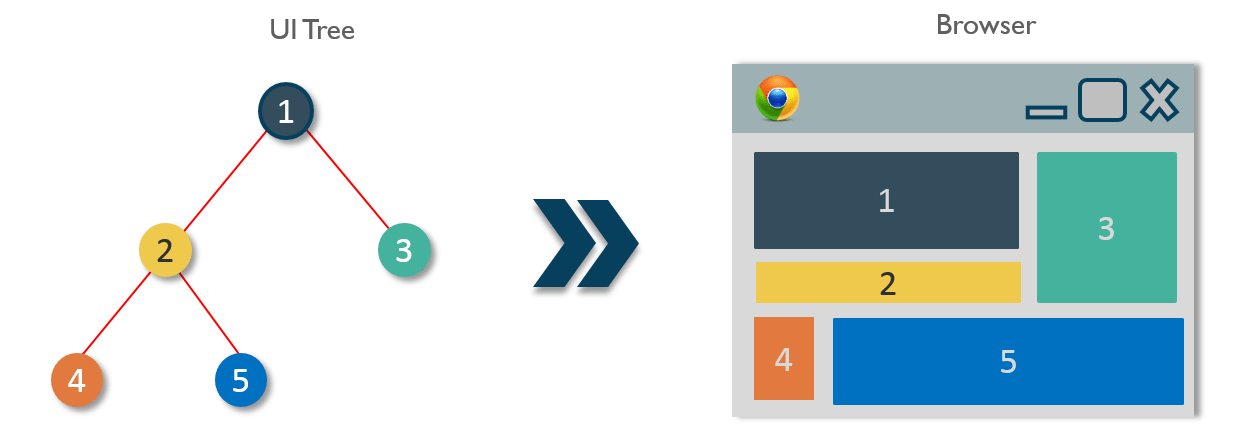
Components play a crucial role in any React App. They are essentially React functions that produce an HTML element. Imagine them as substantial HTML sections of code that perform specific functions for the app, such as the navigation bar or panels.
In React, these components are organized as nodes in the Virtual DOM. They will then be displayed on the browser based on the appearance we define for them. Refer to the diagram for a visual representation.
 React Components - UI Tree
React currently has two types of components: Class and Functional.
Class Components
Class components in React are simply classes designed for React. One important rule when naming components is to use a capital letter for the component name.
Let's write a simple House class component.
- Import react and react-dom
- Write the class House
- Call the ReactDOM.render()
//1.
import React from 'react'
import ReactDOM from 'react-dom'
//2.
class House extends React.Component {
  render() {
    return (
      <div>
        <h2>This is a house</h2>
      </div>
    )
  }
}
//3.
ReactDOM.render(<House />, document.getElementById('root'));
Let's also create a Door class and make it a child component of the House (i mean - duh).
First, we create the Door class.
class Door extends React.Component {
  render() {
    return (
      <div>
        <h3>This is a door</h3>
      </div>
    )
  }
}
Then we add it inside the House class to make it its child.
class House extends React.Component {
render() {
return (
<div>
<h2>This is a house</h2>
<Door /> <!--here is the Door component-->
</div>
)
}
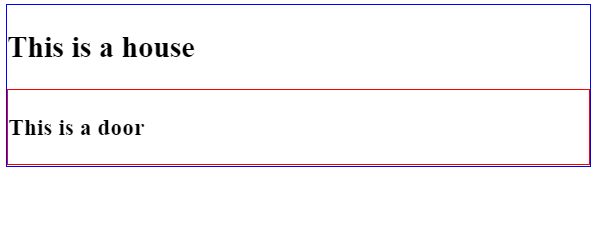
}The screenshot below displays how the app appears in the web browser. I also added outlines to each part to make them more visible. Both categories are shown accurately, with Door as the red outlined box displayed within the House, which is depicted by the blue outlined box.
 Class Components
Function Components
Another type of component we can create are function components. Similar to class components, they return HTML codes and their names should begin with capital letters.
Now, let's create the House and Door using function components.
import React from "react";
import ReactDOM from "react-dom";

function House() {
  return (
    <div>
    <h2>This is a house</h2>
    <Door/> <!--add Door as child-->
  </div>
  );
}

function Door() {
  return (
    <div>
    <h3>This is a door</h3>
  </div>
  );
}

ReactDOM.render(<House />, document.getElementById("root"));
And that's it! They basically work the same way and display the same elements. Keep in mind that for function components, you don't have to include the render() function before the return statement.
React Props
In React, components can have props, which work like arguments in a function or attributes in HTML.
Let's go back to our house and door example. Imagine having multiple Door components within the House. How can we differentiate one Door from another? One way is to give each Door a title prop. You can achieve this by adding the title prop in the Door component like so:
<Door title="front" />Somewhat like HTML attributes, right? Then, in the Door component, we can display its prop like this.
//pass props as argument first
function Door(props) {
return (
<div>
<h3>This is the {props.title} door</h3>
</div>
);
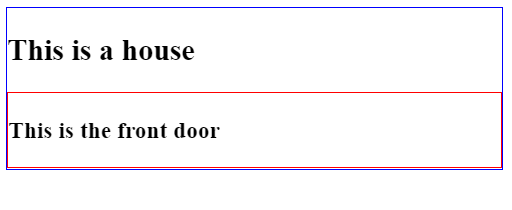
}And our app would print the title out as expected.
 Props visualization
Now we can add lots of Door components inside House and have title to distinguish them.
function House() {
  return (
    <div>
    <h2>This is a house</h2>
    <Door title="front"/>
    <Door title="back"/>
    <Door title="kitchen"/>
    <Door title="bedroom"/>
  </div>
  );
}
Result would look like:
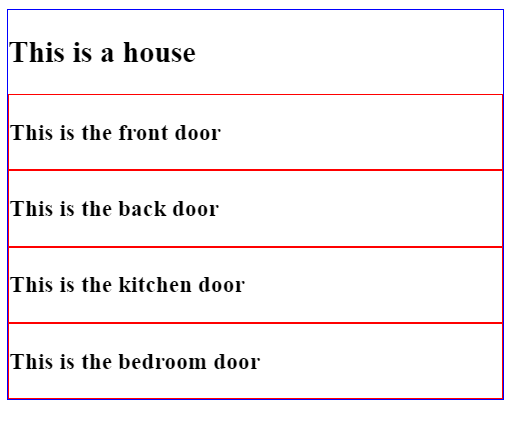 Props visualization
Similar to how arguments are for a function, props for a Component are read-only. A Component cannot alter the value of the props it receives.
React States
Let's now briefly discuss states. In React, a state is an object that stores variables. These variables can only be accessed within the Component (unless, of course, you utilize state management tools like Redux).
Let's include some states to fluff-up our House class component.
class House extends React.Component {
  constructor(props) {
       super(props);
       this.state = {
            color: "white",
            rooms: 4
       };
  }
  render() {
    return (
      <div>
        <h2>This is a {this.state.color} house with {this.state.rooms} rooms.</h2>
      </div>
    )
  }
}
In the code above, we add our state object in our constructor function. Then we edit the HTML element to return a sentence with the state color and rooms property. The result will be:
 States visualization
Basic React Hooks
In our previous example, we saw how to use states in our House class component. In function components, we can use something called React Hooks to manage our states.
I have a whole series called A Look at React Hooks on all the basic React Hooks. Let's take a look at some of them briefly.
useState() hook
This hook allows components to start and update states. Here's a simple example.
import React, { useState } from "react";
import ReactDOM from "react-dom";

function House() {
  const [color, setColor] = useState("white");
  return (
    <div>
      <h2>This is a {color} house</h2>
    </div>
  );
}
First, set the initial state to "white" within the useState hook. The hook will return an array containing the state's value (color) and its setter function, which is utilized for state updates (setColor).
Next, incorporate the state's value into the return function, and the application will showcase the state.
 State visualization
For a more detailed explanation of this Hook, please read this article.
useEffect() hook
Another useful hook is the useEffect hook. It executes a function whenever a specified state has changed.
Returning to our House component, we introduce another variable named "door" that will keep track of the number of doors in this house. We initialize it to 0 using the useState hook.
Next, we include a button that, when clicked, will increment the value of "door" by 1. Lastly, we implement a useEffect Hook that will display the number of doors in the house every time the value of "door" is updated.
The code will look as follows:
function House() {
  const [color, setColor] = useState("white");
  const [door, setDoor] = useState(0); //initialize door as 0

//add 1 to the current value of door on every button click
  const addDoor = () => {
    setDoor(door + 1);
  };

//finally, trigger the function to print the door value whenever door is updated
  useEffect(() => {
    console.log(`Door count: ${door}`)
  }, [door]);

  return (
    <div>
      <h2>This is a {color} house</h2>
      <button onClick={addDoor}>Add a Door</button>
    </div>
  );
}
The result:
 React Hooks visualization
For a more detailed explanation of this Hook, please read this article.
How to create React App
Whith those basics covered, let's take a look at a typical React environment.
First, make sure you have npm and Node.js installed in your machine. If not, get them here.
The easiest way to set up a React app is to install create-react-app like so:
npm install -g create-react-appThen, create a new React app with this command:
npx create-react-app app-name-hereNavigate to the app folder.
cd app-name-hereAnd run the following command to launch the app in localhost.
npm start Create-React-App
App Structure
A new Create React App will have the following folder structure.
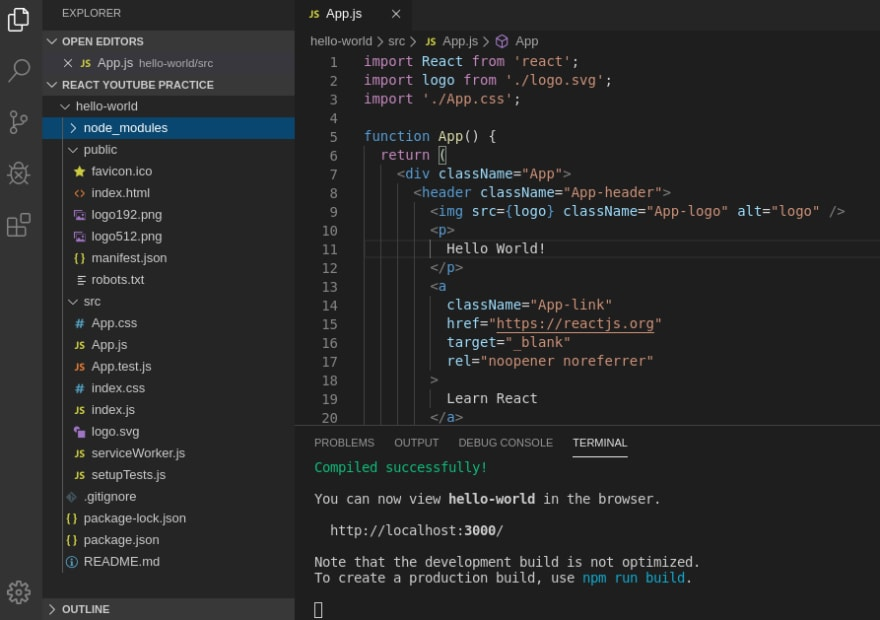 Create-React-App structure
Let's briefly go through them one by one.
- package.json: shows the dependencies and the scripts used in the app.
- package-lock.json: make sure dependencies are installed.
- .gitignore: files that git will not include in every commit.
- Readme: an ordinary markdown file to describe your app.
- node_modules: where all your dependencies are installed.
- public folder: won't really touch these files during development.
- src folder: where most development will take place.
- src/index.js: specifies the 'root' element
- src/App.js: The App component. Edit this to see what gets rendered onto browser.
- src/App.css: Styling for App.js.
It may seem complicated at first. If you are a beginner, focus on the src/App.js file initially. Edit its HTML code, add some basic functions, and understand how it works. Once you are more comfortable, you can add more files as components into the src folder, such as a Home.js for the Home component, a Login.js for the Login component, and so on.
Styling
Once you've made some simple functions and components in your first React app, you might be curious about how to make the app look the way you want. In React, you can customize styles in a couple of ways: using inline styles or importing css modules.
Inline styling
Just like the name implies, you can put the styling directly within the HTML element. For instance, let's give our house a border. The color of the border will be based on our color variable.
function House() {
  const [color, setColor] = useState("red");
  return (
    <div>
      <h2 style={{"border":`1px solid ${color}`}}>This is a {color} house</h2>
    </div>
  );
}
Since the value of color is initialized to red, the app will look like:
 Inline styling
Alternatively, you can create a style object and pass it in the style attribute like so:
function House() {
  const [color, setColor] = useState("red");

//style obj contains the css
  const style={
    "border":`1px solid ${color}`
  }

  return (
    <div>
      <h2 style={style}>This is a {color} house</h2>
    </div>
  );
}
CSS modules
Another method to style is by making a .css file and linking it to the React component. I made a basic styles.css file with the following styles:
h2 {
  font-family: "Gill Sans", "Gill Sans MT", Calibri, "Trebuchet MS", sans-serif;
  padding: 10px 5px;
  border-radius: 10px;
}
Then, in my House component file, import the file as shown below:
import React, { useState } from "react";
import ReactDOM from "react-dom";
import "./style.css"; //import here

//keep everything else the same
function House() {
  const [color, setColor] = useState("red");

  const style = {
    border: `1px solid ${color}`
  };

  return (
    <div>
      <h2 style={style}>This is a {color} house</h2>
    </div>
  );
}
Now our app will look like:
 CSS styling
More to Learn!
That wraps up this cheat sheet, which covers the basics of React. This is a brief article, so it obviously doesn't delve into every aspect of React. However, I hope it serves as a helpful introduction for anyone starting their coding journey, without feeling too overwhelmed.
As I always like to mention, practising and building projects will help anyone to learn anything faster. To read more about React for beginners, check out my blog and my A Look At React Hook Series. A series dedicated for beginners to start learning about basic React Hooks and more.
Thanks for reading and if you find this React cheat sheet helpful, please like and share this article around for more reach. Cheers!

Victoria Lo
Solutions Engineer @ PayPal
Victoria Lo is currently a Solutions Engineer at PayPal. Her background is in full-stack software/web development. She loves to share her knowledge on programming and give advice for new developers on her blog. Besides being passionate about blogging and software, she loves to read books, play video games and collect quotes.
Read similar articles
How to Build and Deploy Superheroes React PWA Using Buddy
Check out our tutorial
How to Build a Quote Gallery App using Google Sheets
Check out our tutorial
React vs. Vue.js: What's the best in 2021
Check out our tutorial