Buddy and GitHub Integration
What is GitHub?
GitHub is a version control platform used for collaboration in software development projects. Featuring pull requests, branching, code review, and issue tracking, it is a popular choice for projects utilizing Git version control system.
Connecting your GitHub repositories with Buddy lets you trigger pipelines whenever changes are made to your source code and automate various tasks related to Continuous Integration and Continuous Deployment (CI/CD).
Since testing is an integral part of software engineering, hooking your repo with Buddy lets you automate the execution of unit tests and integration tests, either on changes pushed to the repository, or recurrently.
In addition to automated testing, you can expand and secure your software development process by enforcing pull requests for merging changes into the production environment.
Buddy uses GitHub Apps to get the necessary account information and access the repositories you want to use in CI/CD pipelines.
GitHub Apps was introduced in November 2021. Projects created before November 2021 remain fully functional and require no action, as they continue using the legacy OAuth-based integration.
Find out more about GitHub Apps authentication in this blog post.
Find out more about GitHub Apps authentication in this blog post.
Setting up GitHub integration
- As the first step, navigate to the Integrations tab and click New integration.
- Look up and click GitHub (it can be found under the Git category):
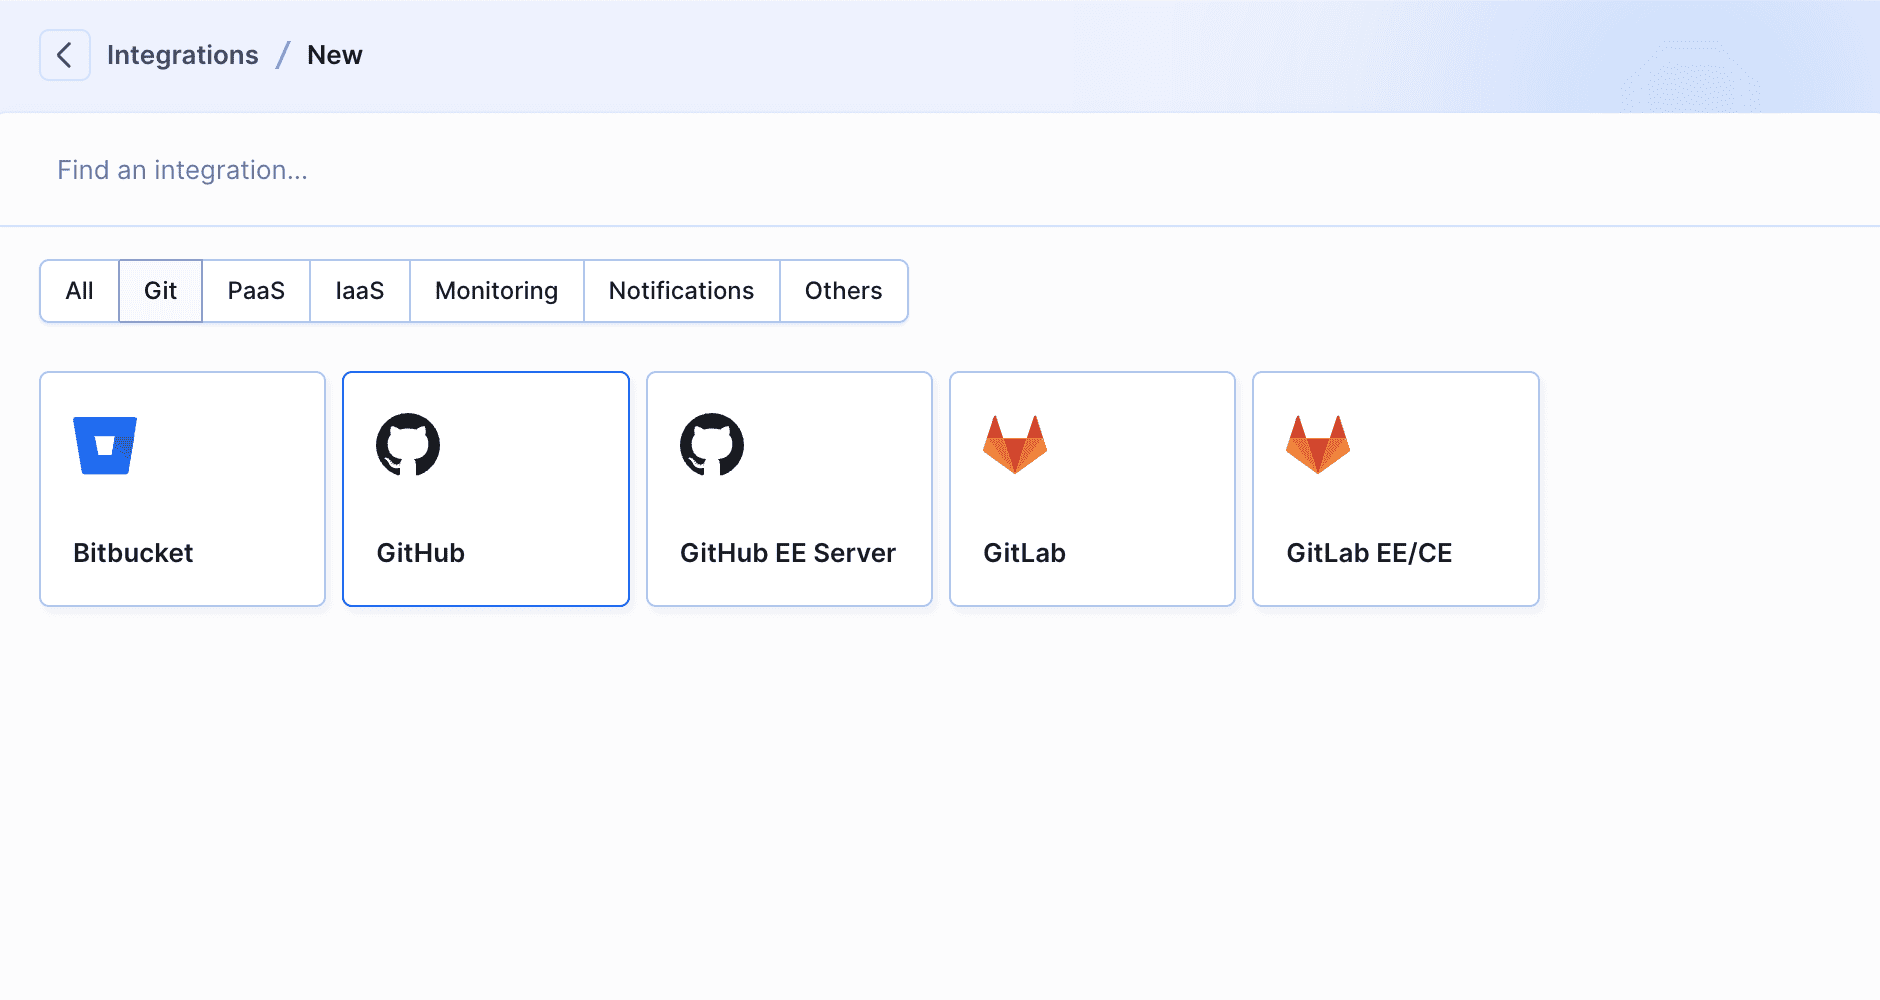 GitHub integration selection
- The configuration window will show up:
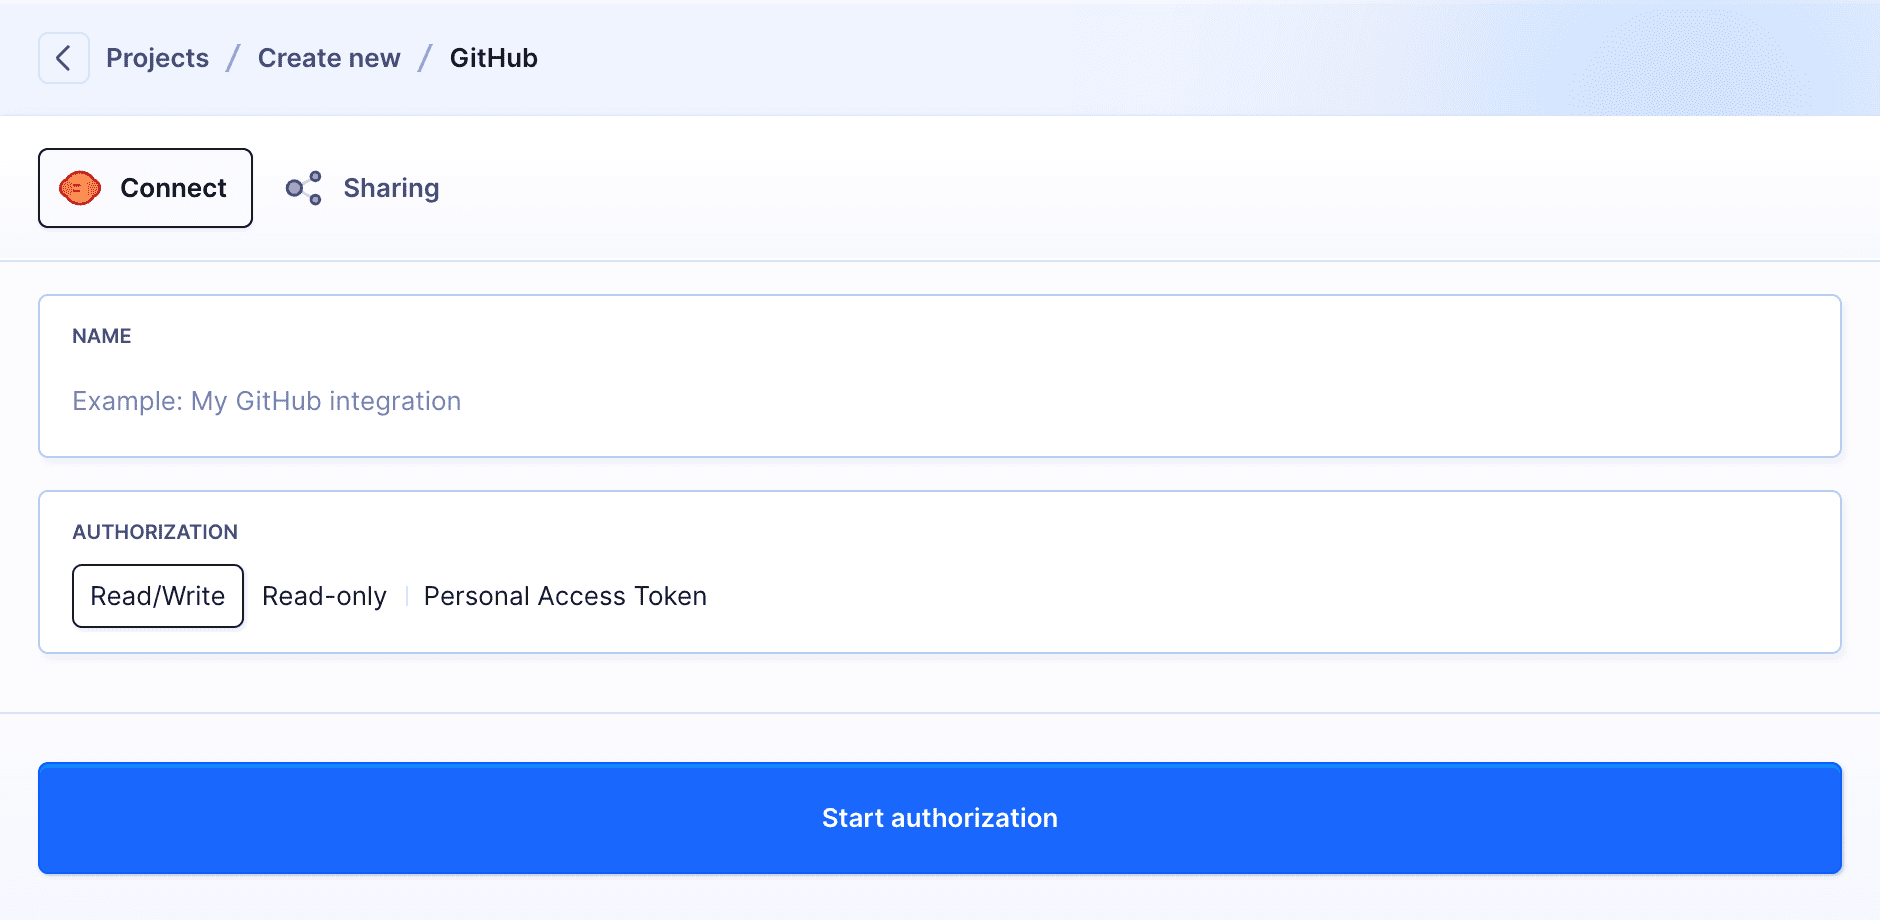 GitHub integration configuration
Here you have to provide the integration name and select the authorization method:
You can adjust the privacy settings of your integration (i.e. who can use it and where) in the Sharing tab.
OAuth authorization
- In the integration configuration window, select permissions scope for your integration (Read/Write or Read-only) and click Start authorization:
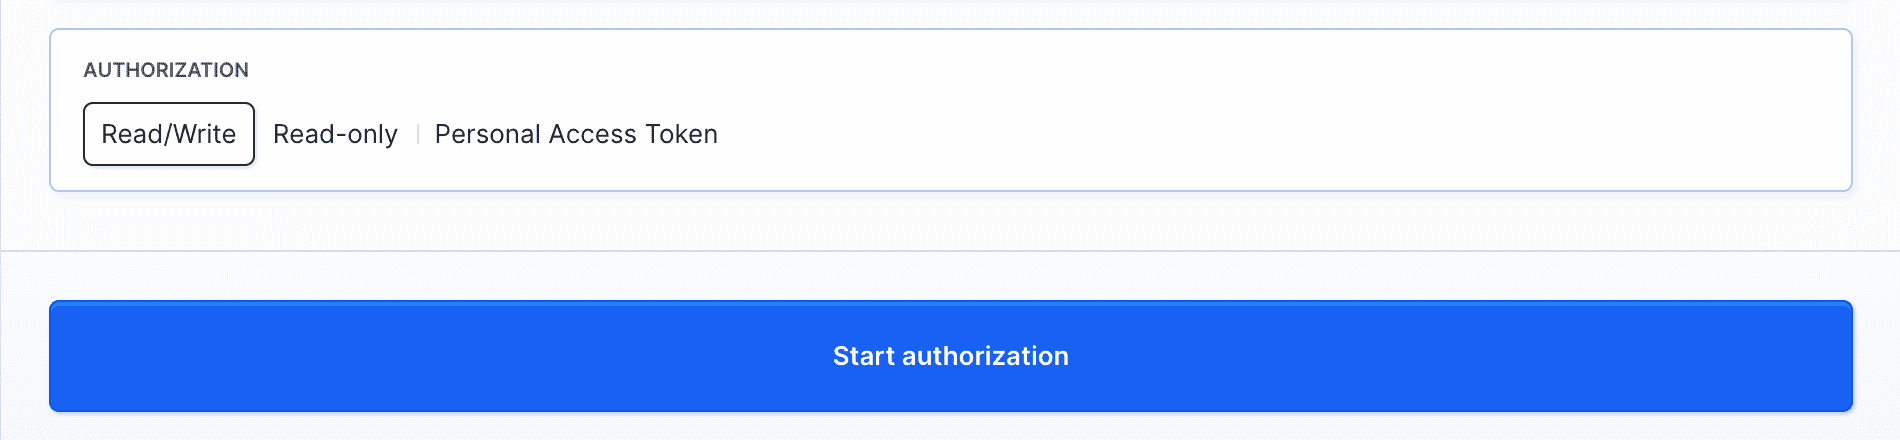 GitHub OAuth authorization configuration
- In the GitHub popup window, click Authorize Buddy to grant Buddy access to the required information from your GitHub account.
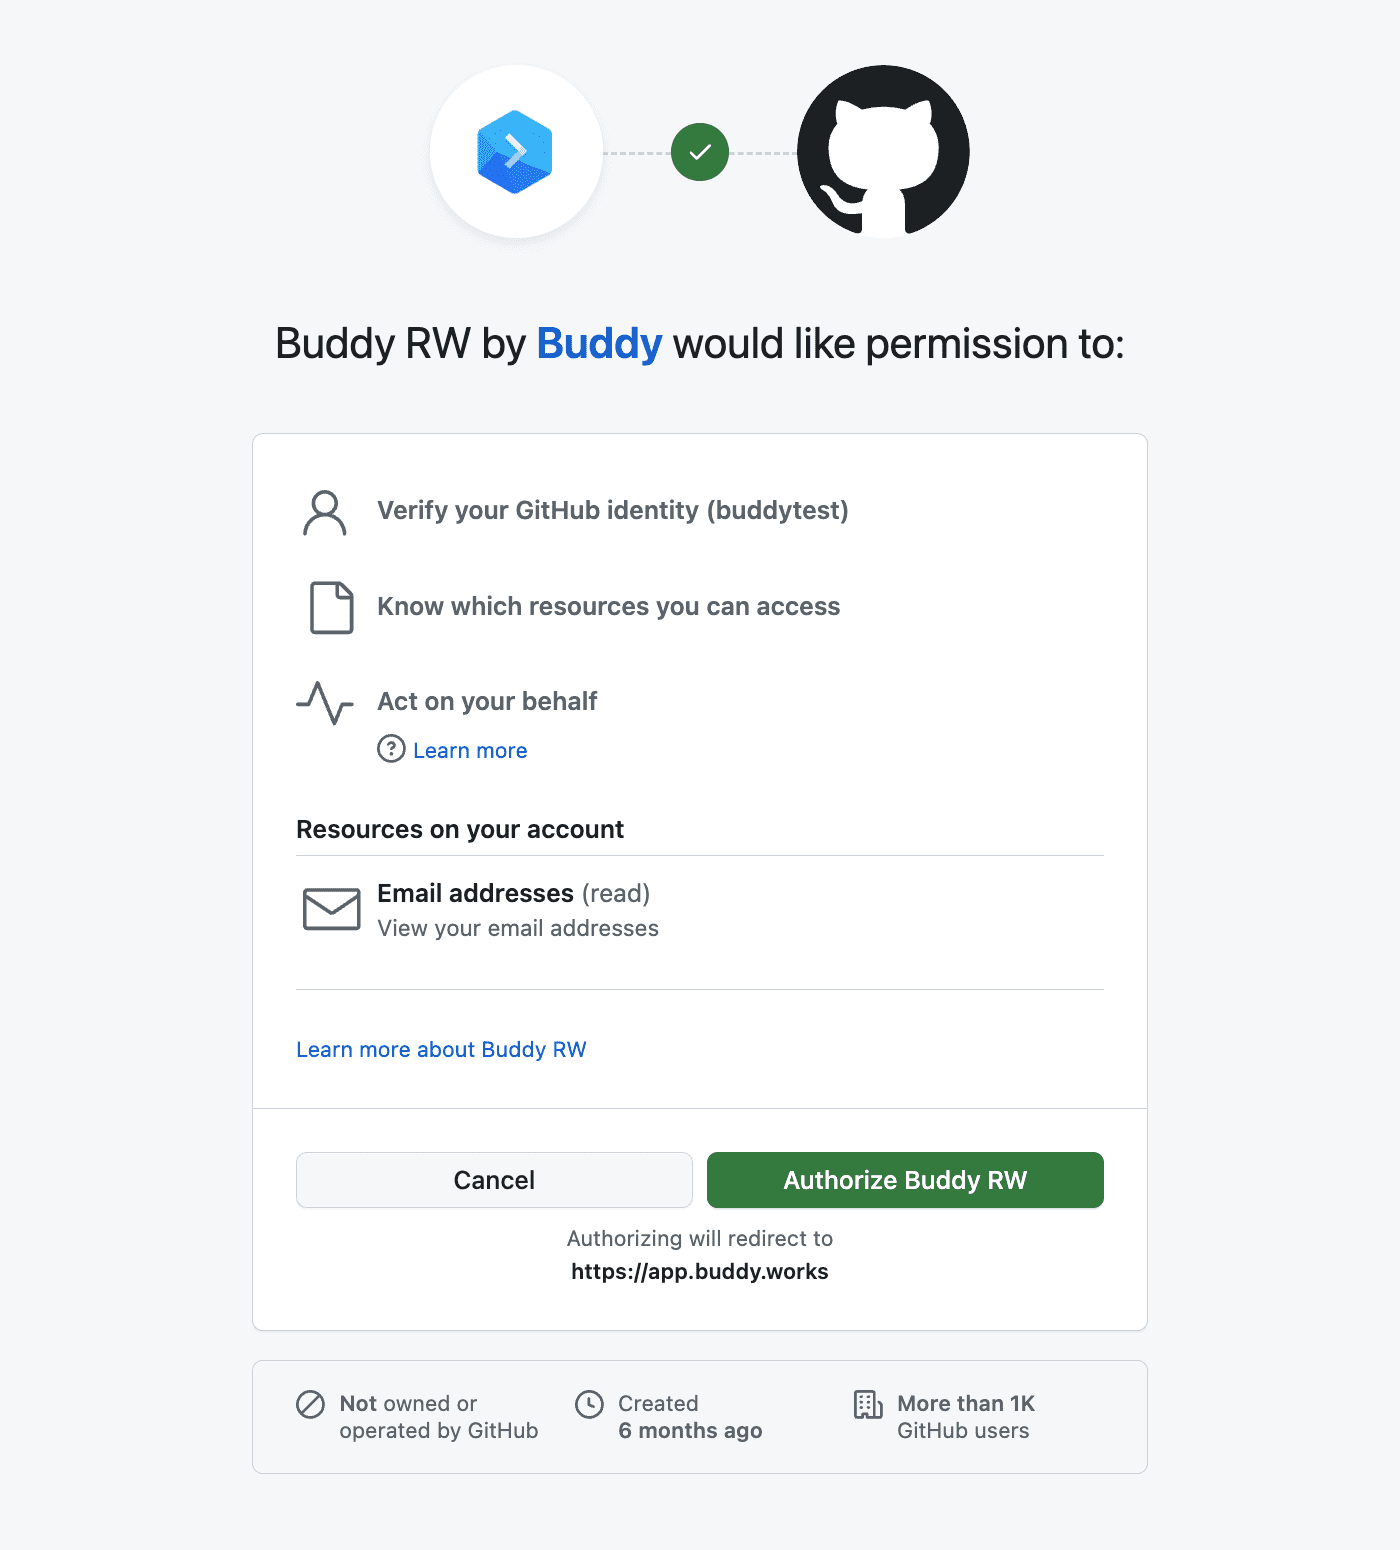 Permission requirements screen
- Select which organization's repositories you want to use in Buddy:
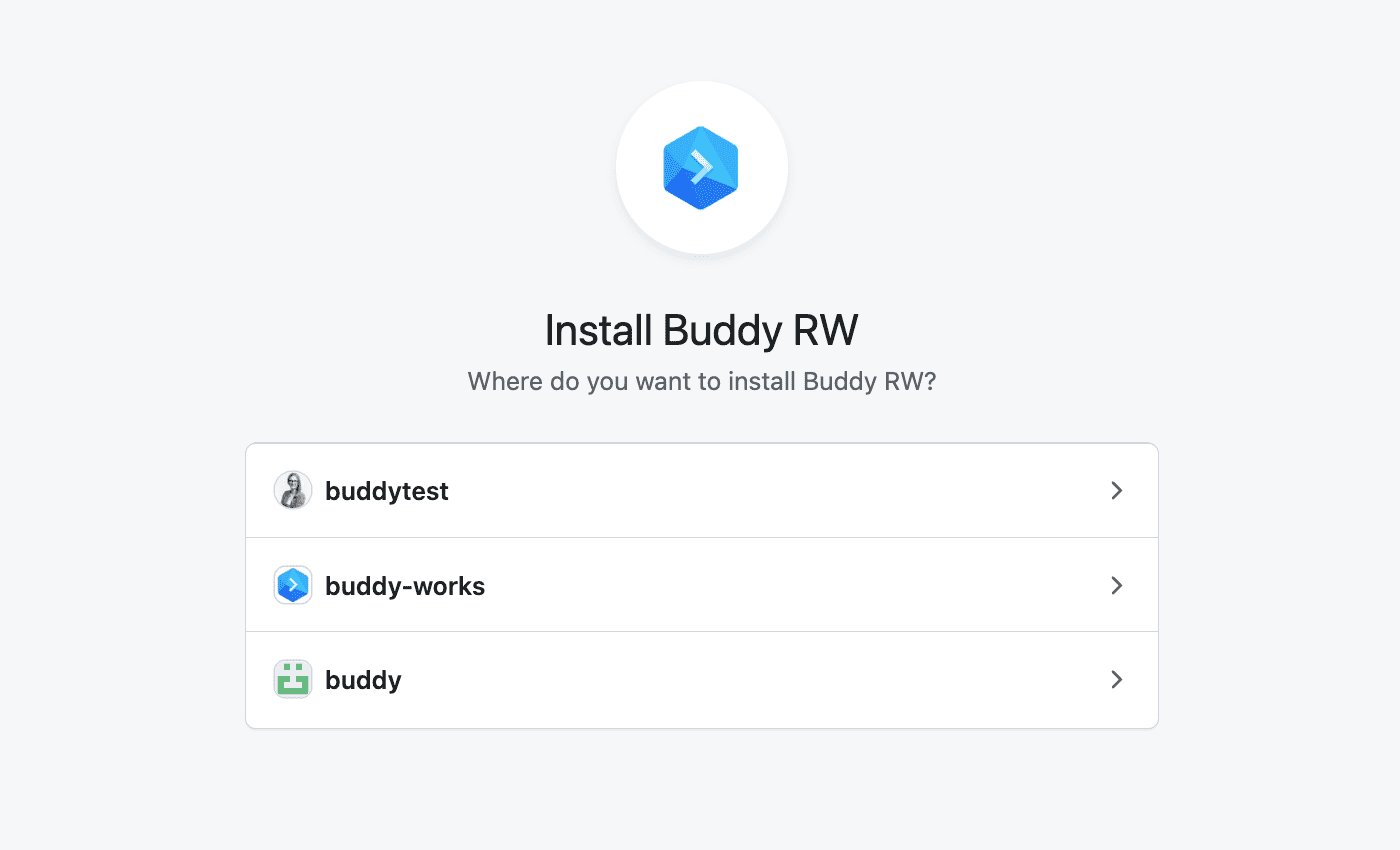 Selecting GitHub organization
- Decide whether you want to give Buddy access to all GitHub repositories within the selected organization, or if you want to limit the permissions to a single repository:
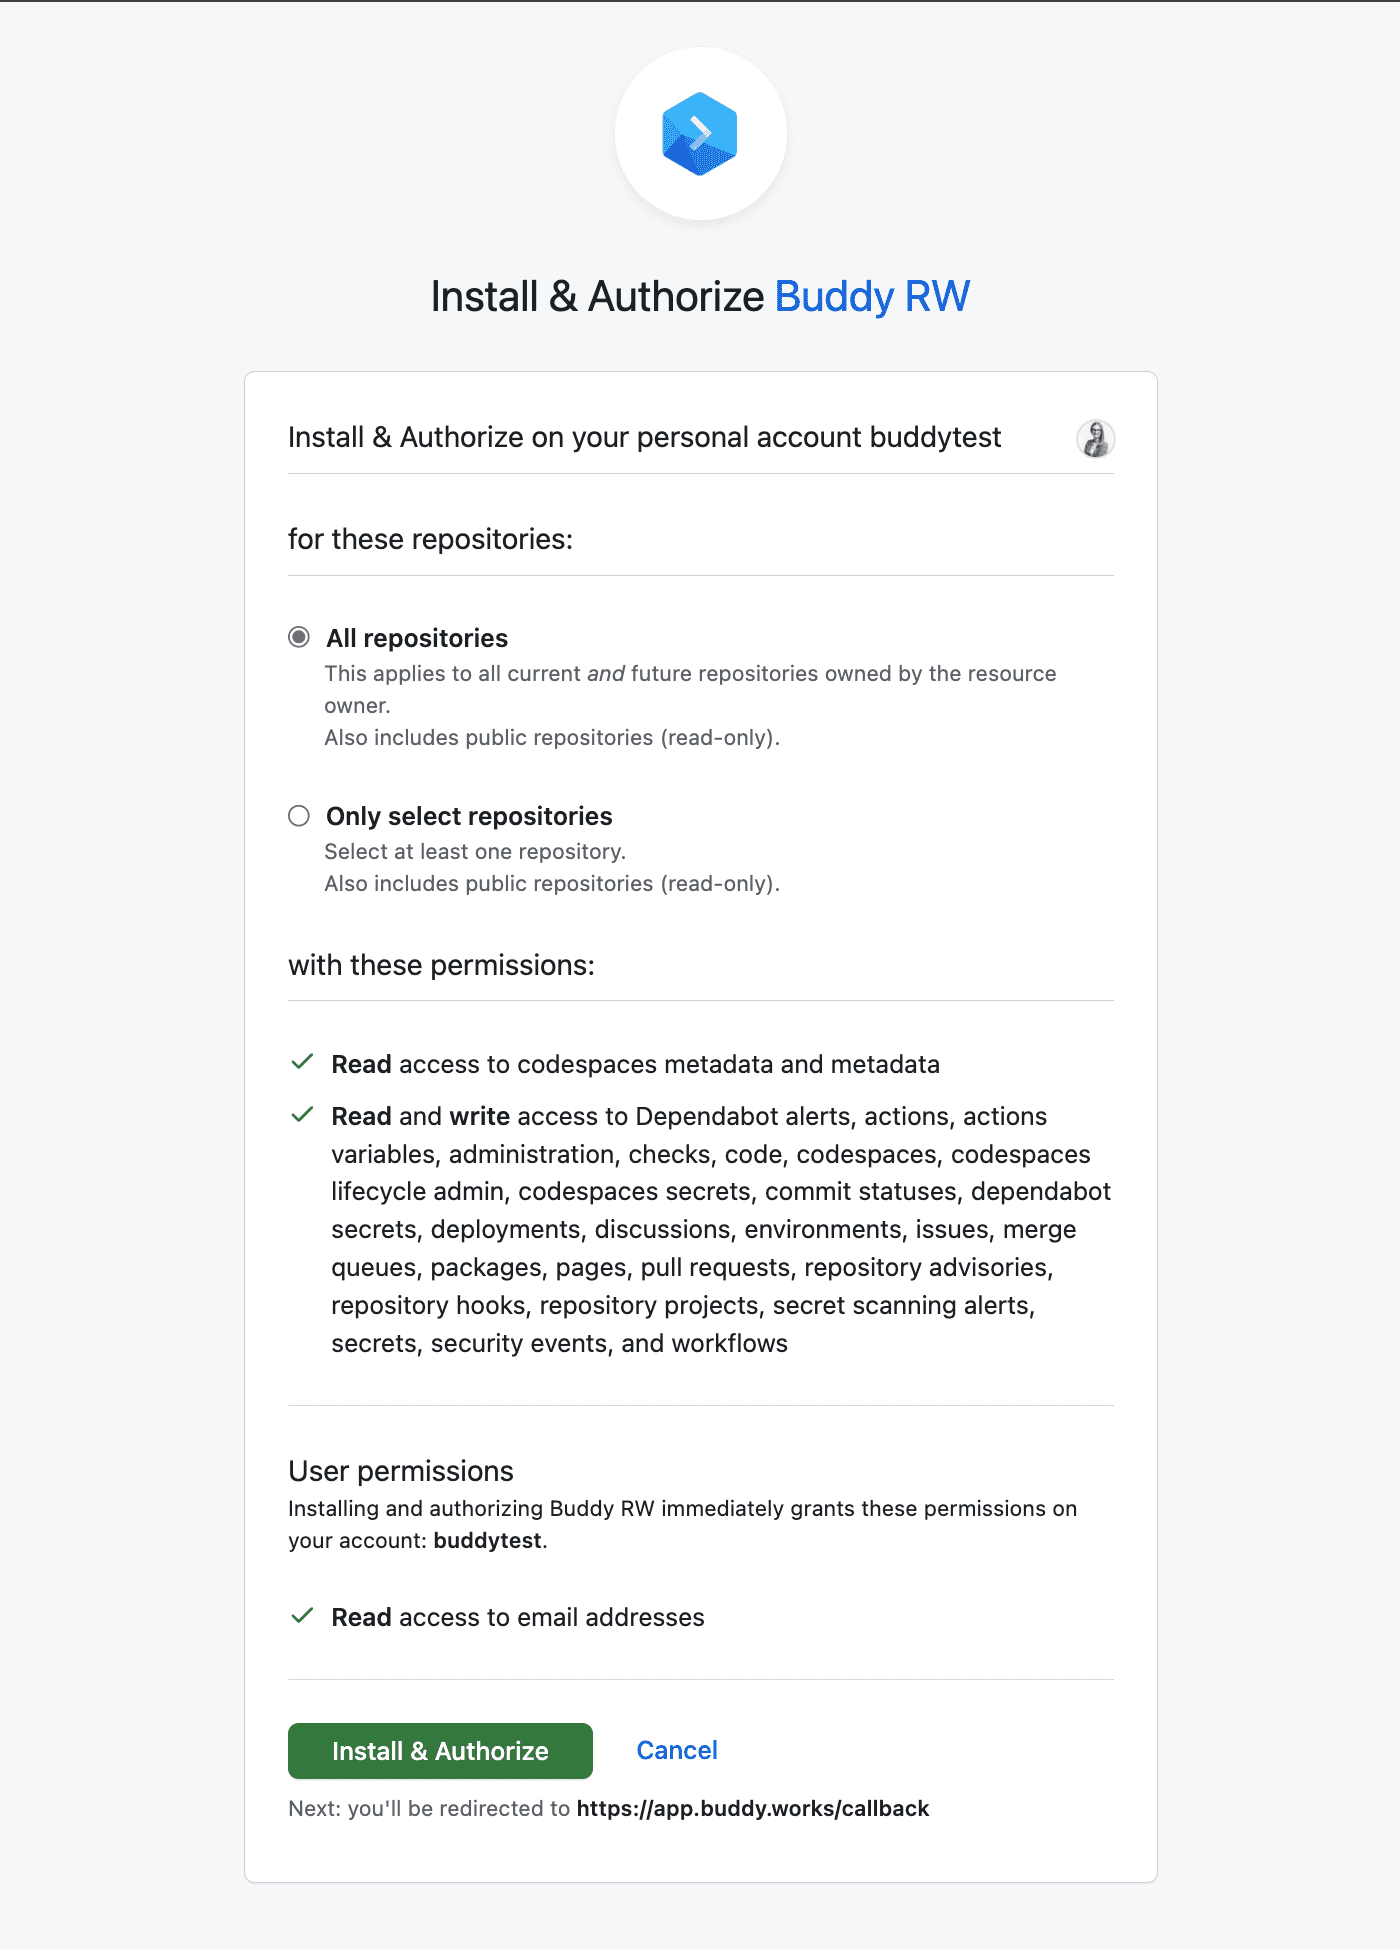 Selecting the scope of GitHub repository access
- Once the configuration is completed, click Add project in your Buddy workspace and choose the repository you want to use. Then you will be able to add your first CI/CD pipeline to the project.
When you create the project, Buddy adds a webhook to your repository. This allows to trigger deployments whenever new commits are pushed to the repo when using the On Push pipeline execution trigger mode.
The contents of the connected repository are reproduced in read-only mode. To view them, go to the Code tab, where you can also browse the files and view commit history.
Personal Access Token authorization
- In the integration configuration window, select Personal Access Token as the authorization method:
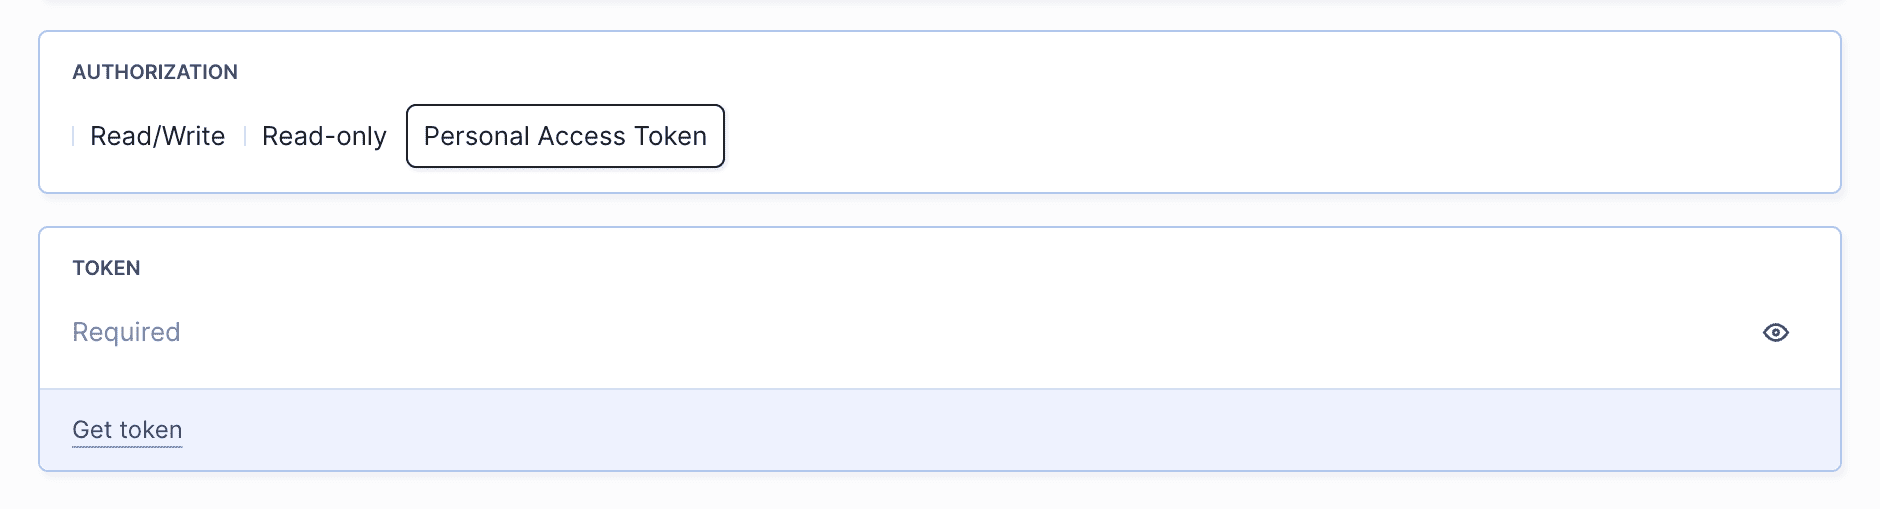 GitHub Personal Access Token authorization configuration
Click 'Get token' in the Token field.
You will be redirected to your GitHub account. Define a new token there and select its access scopes:
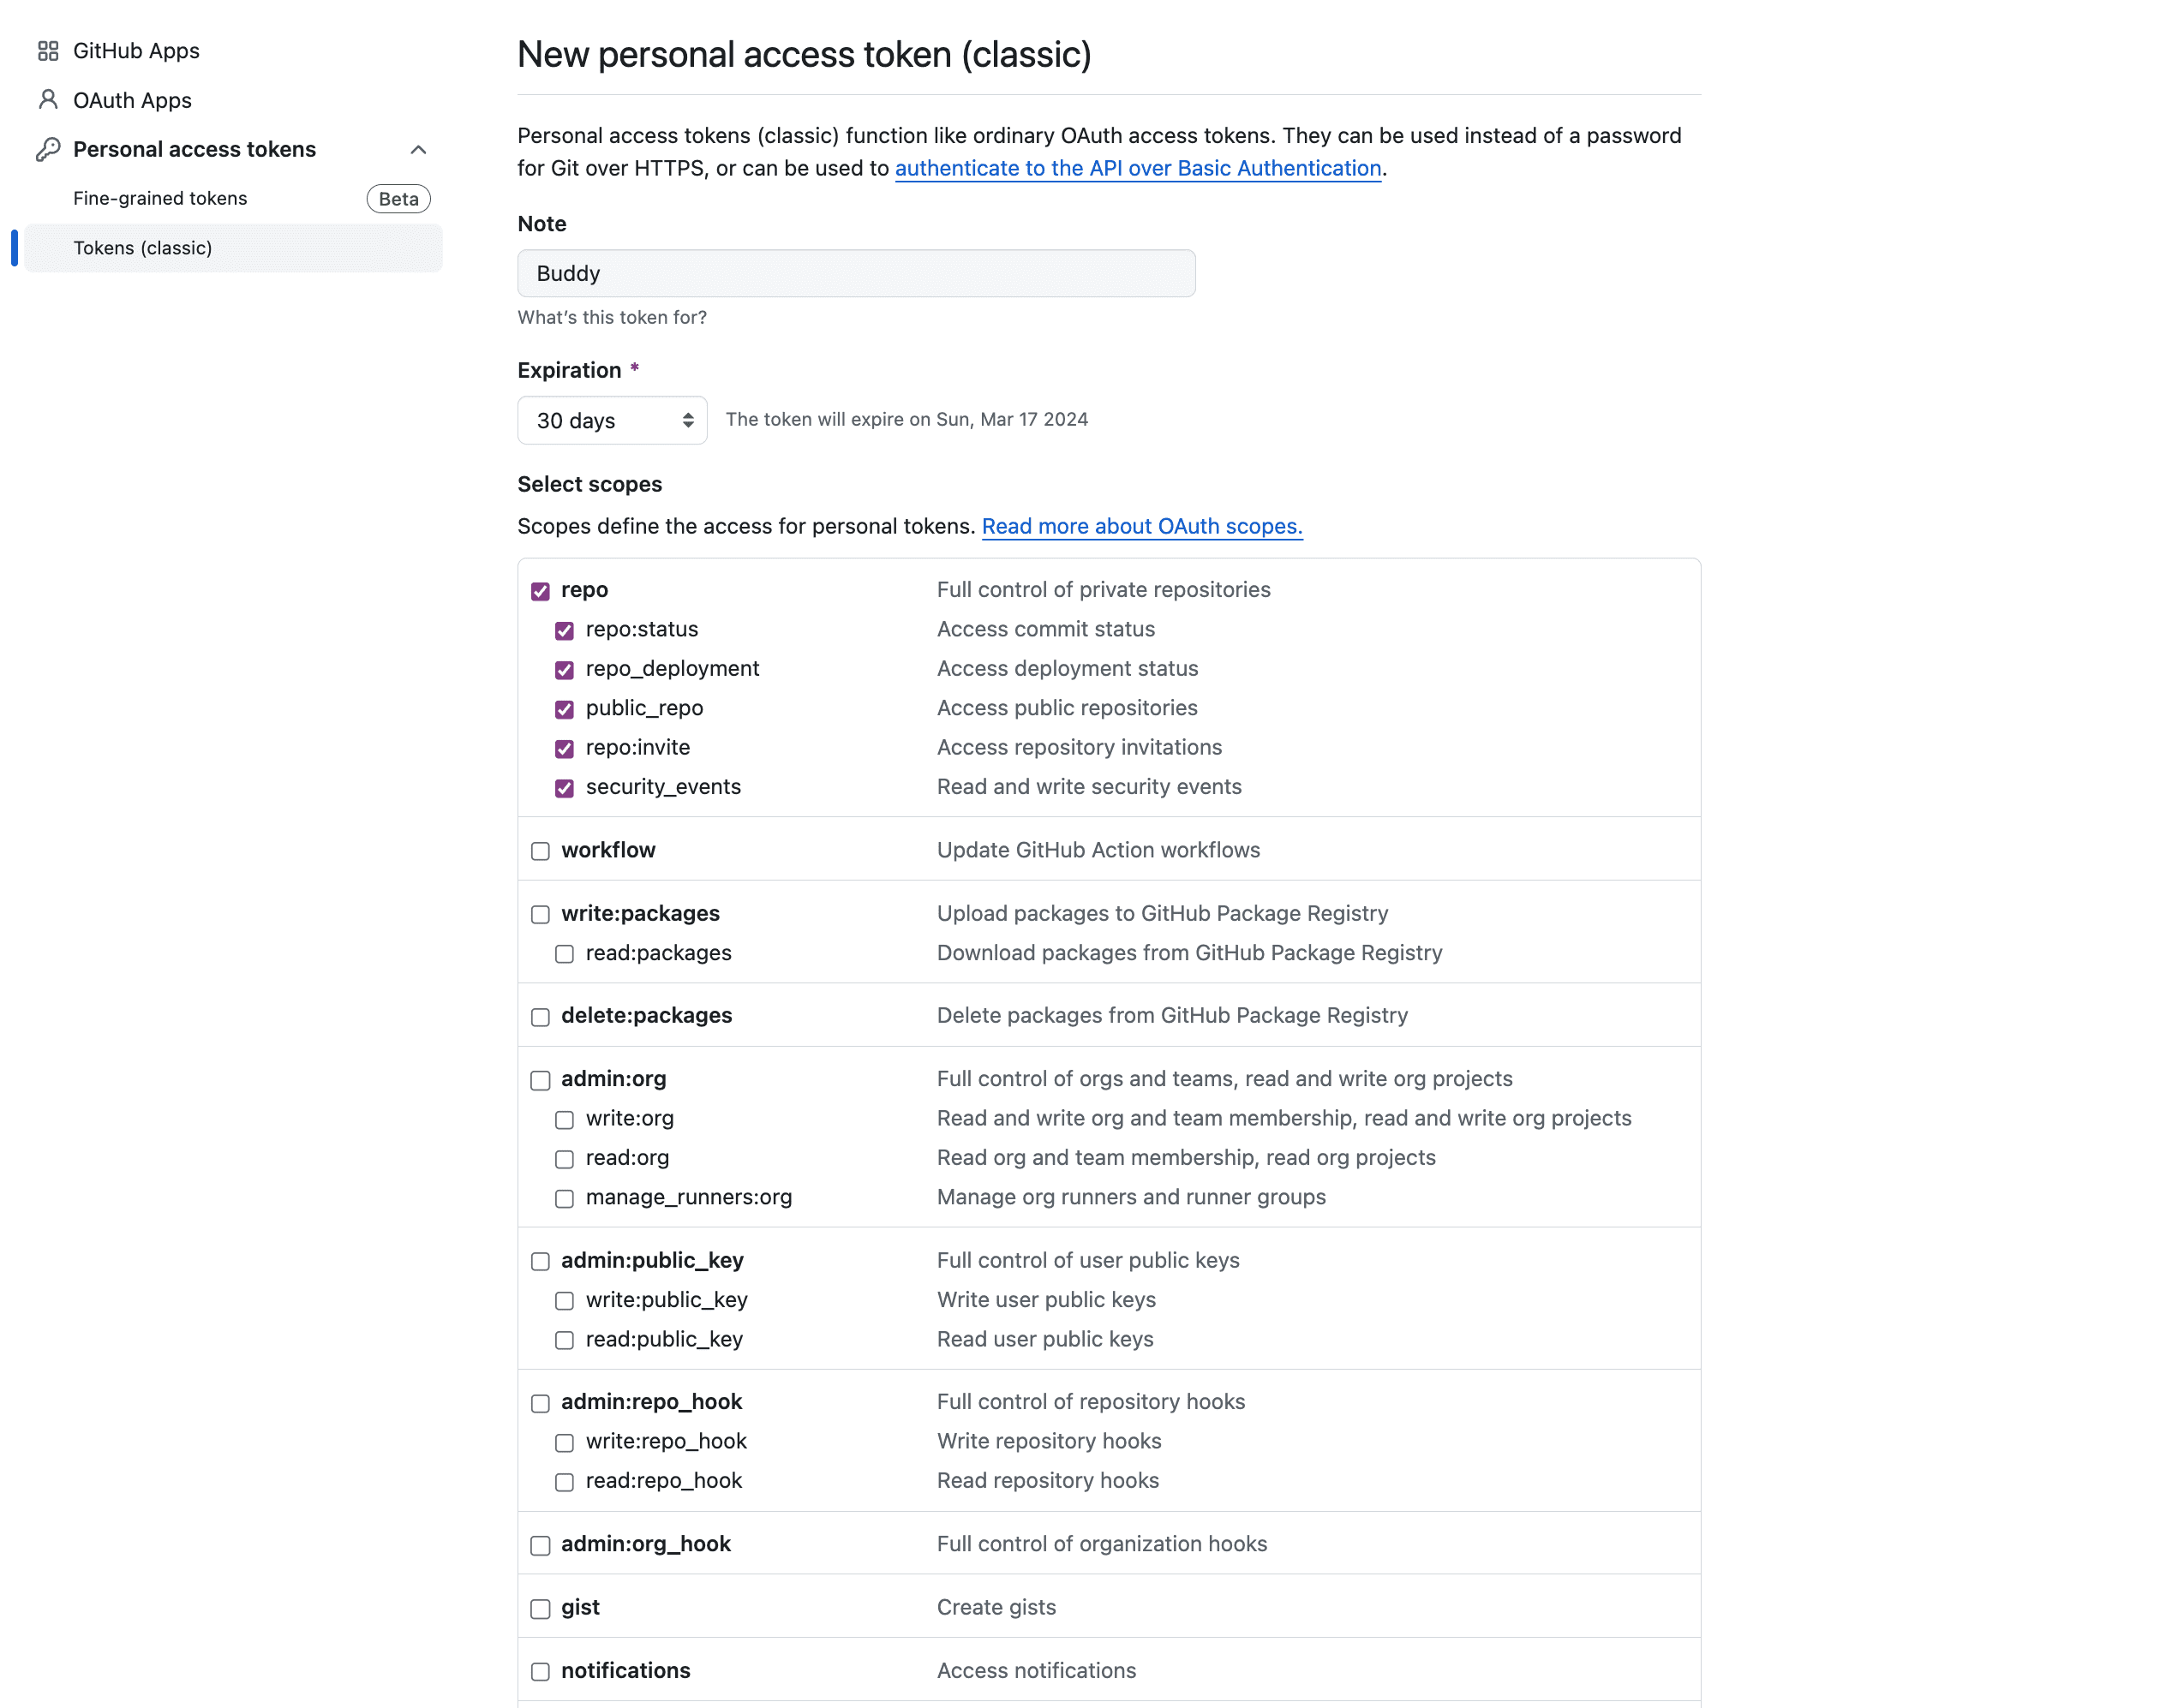 Obtaining personal access token from GitHub
Click Generate Token at the bottom of the page and copy it.
Paste the token in the Token field in Buddy and click Add a new integration.
When ready, you can add a new project and start creating your continuous delivery pipeline.
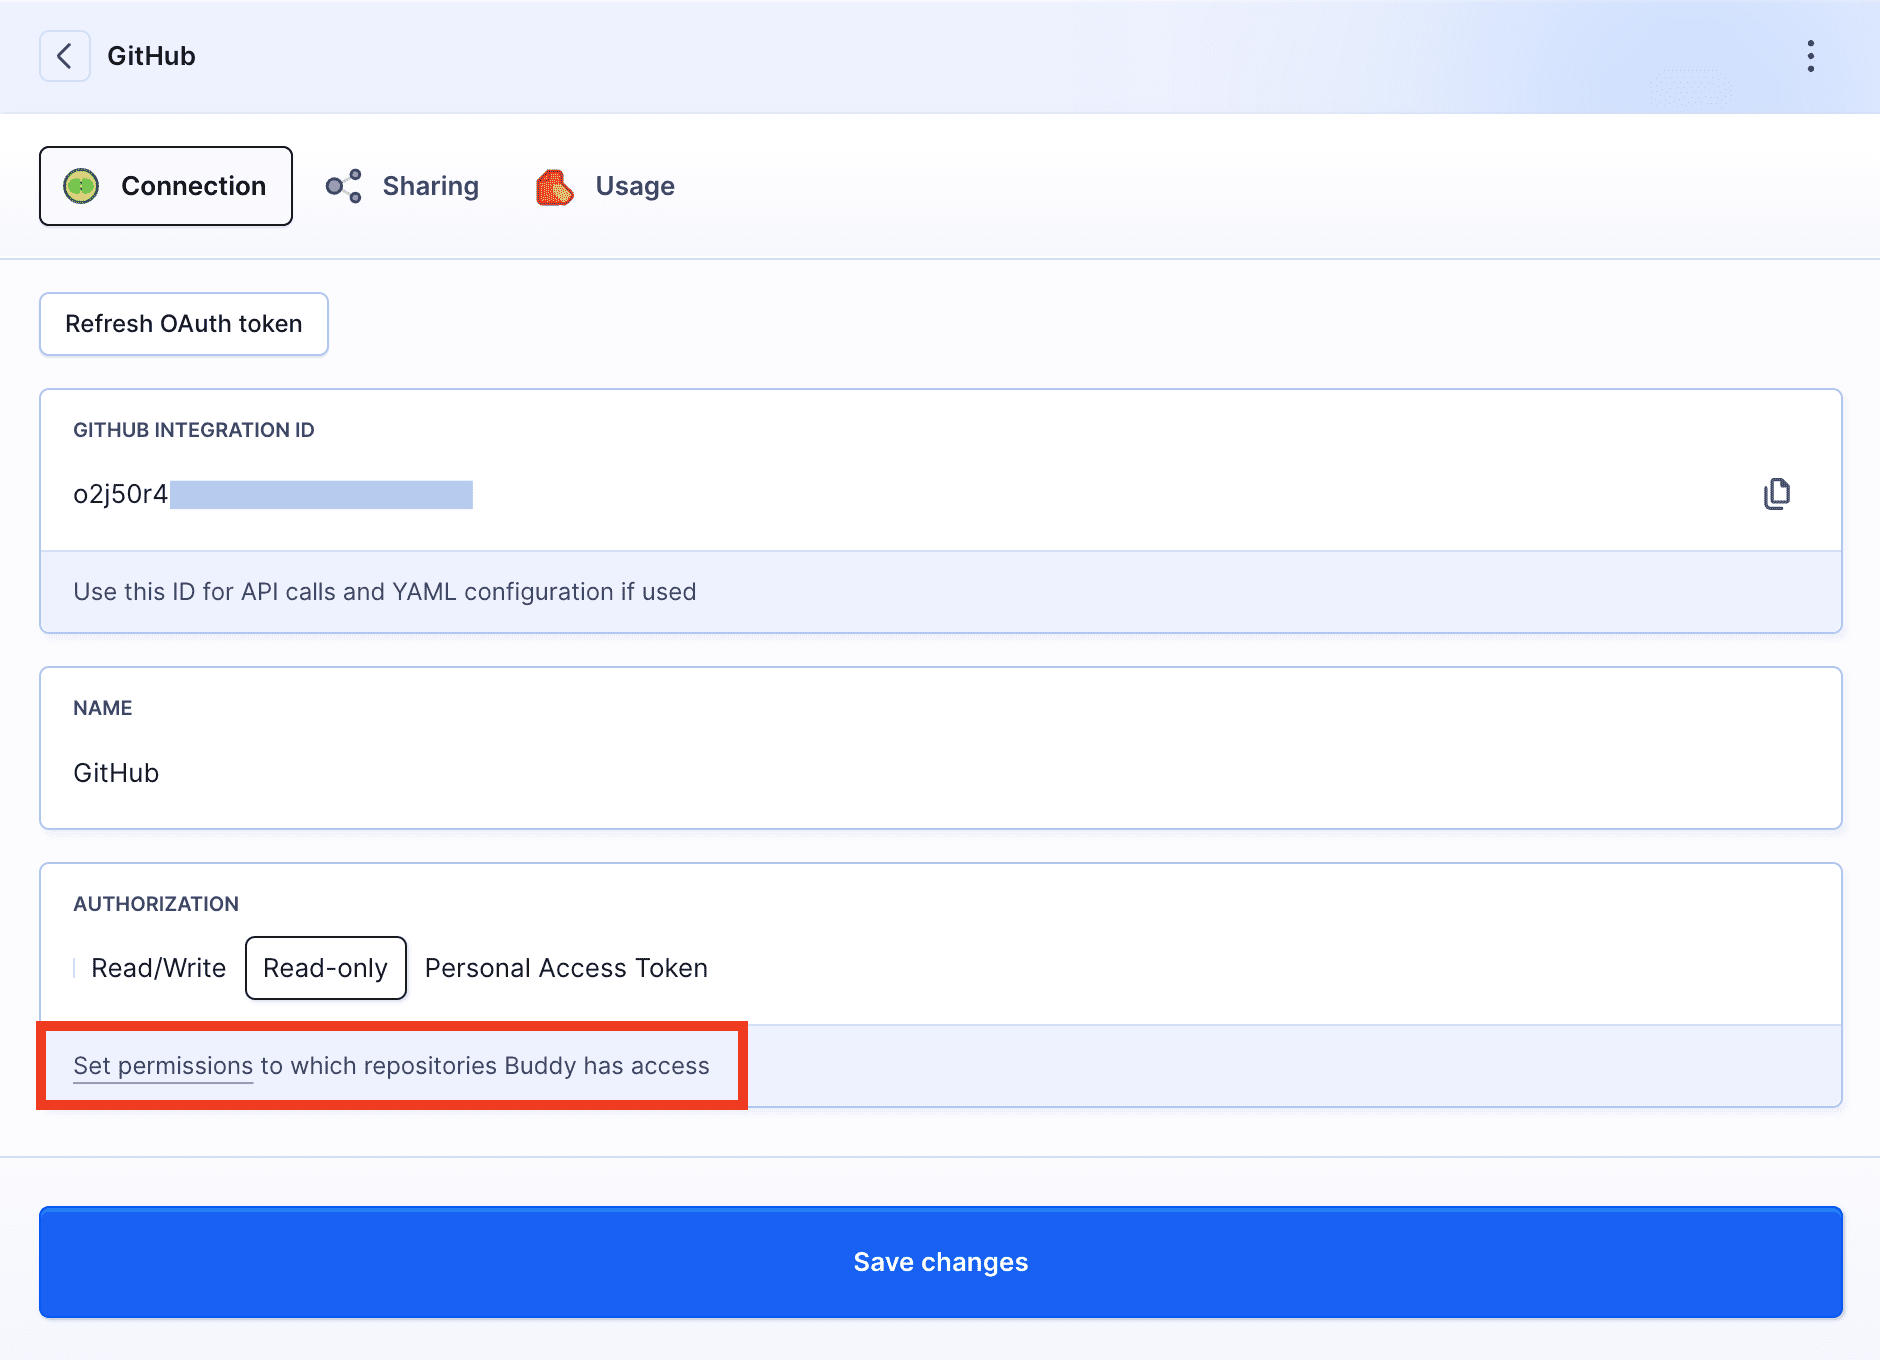
Managing repository access
After adding the integration, you can adjust its access scope or change the GitHub organizations it works with:
- Enter the Integrations tab in the left navigation panel.
- Find the GitHub integration you want to adjust on the list.
- Click
Set permissionsto open a GitHub popup window.
 Integration settings in Buddy
- In the popup window, click the organization name you are already using to change the access scope or revoke access. Choose an organization you haven't used before to configure it and start using it in Buddy.
Look for the word "Configure" to identify the organization(s) you are already using in Buddy.
📚 Learn more about GitHub action features, integrations and alternatives.
Last modified on April 12, 2024